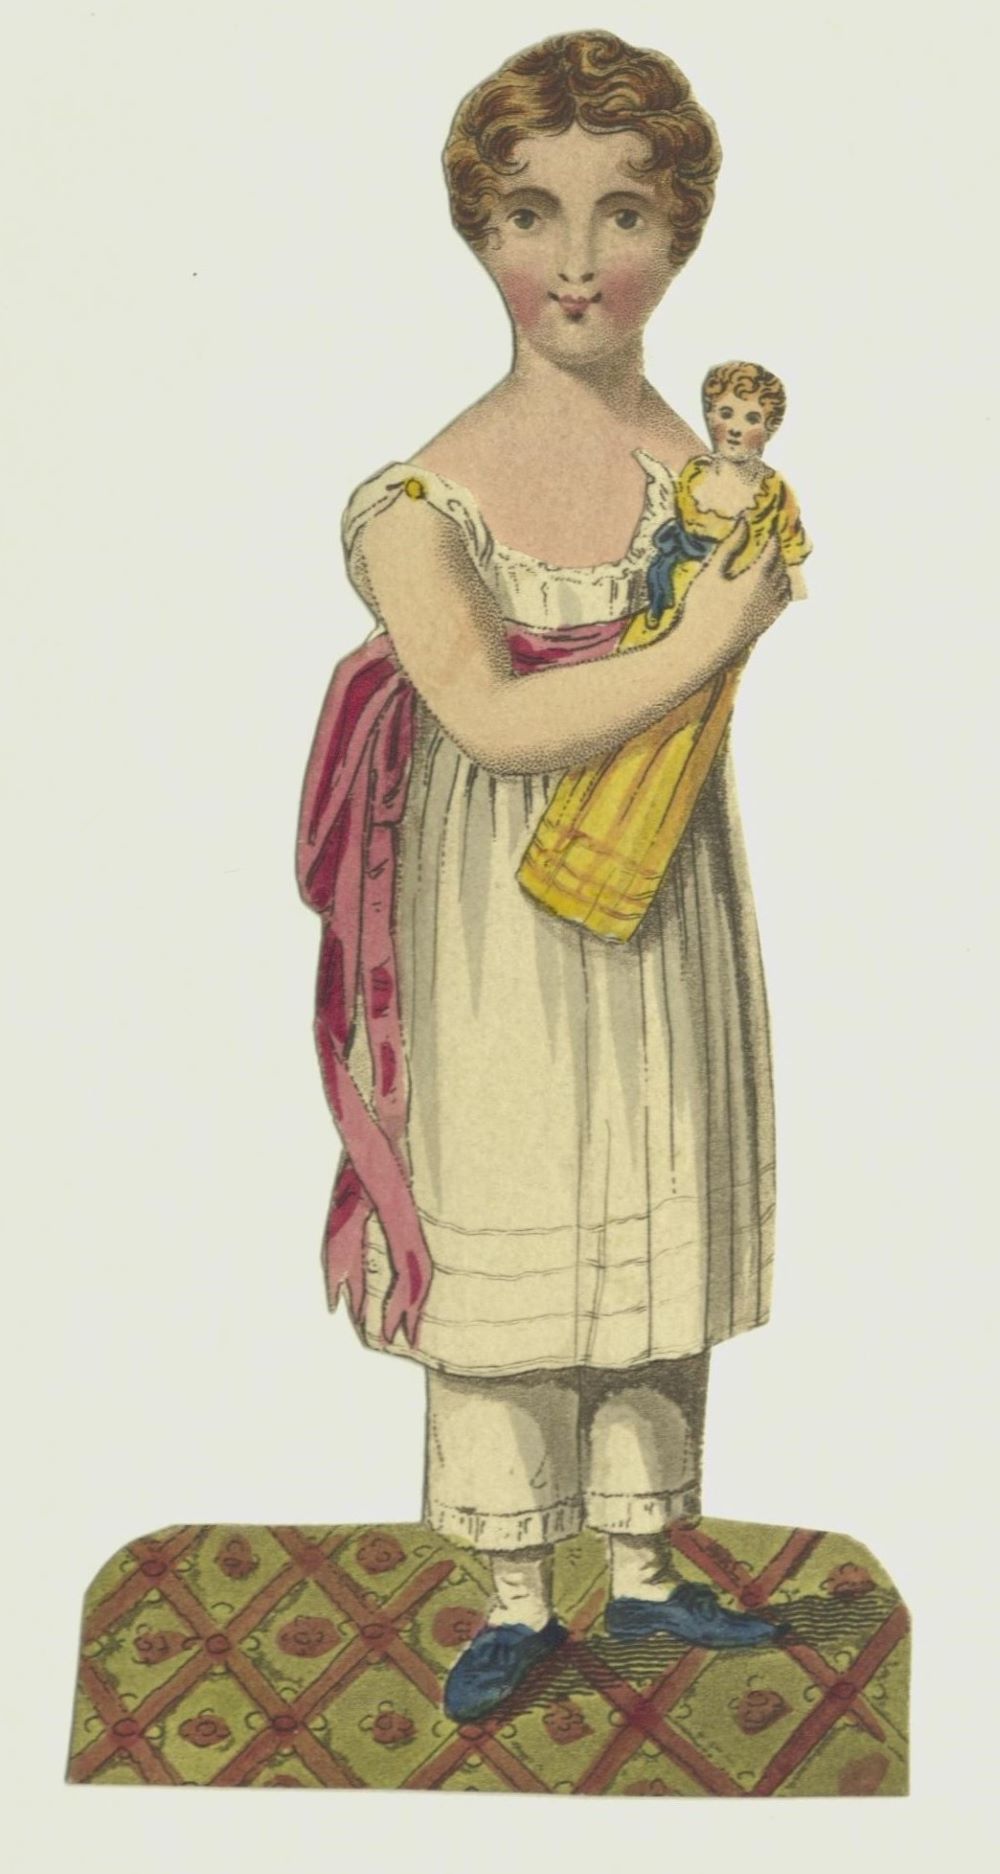
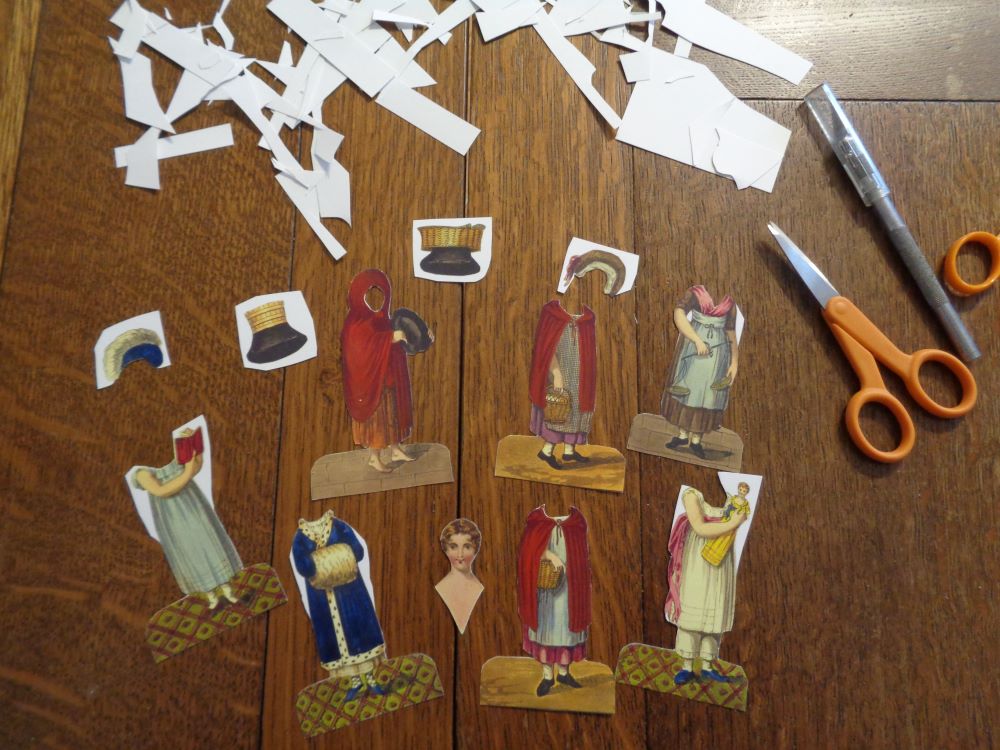
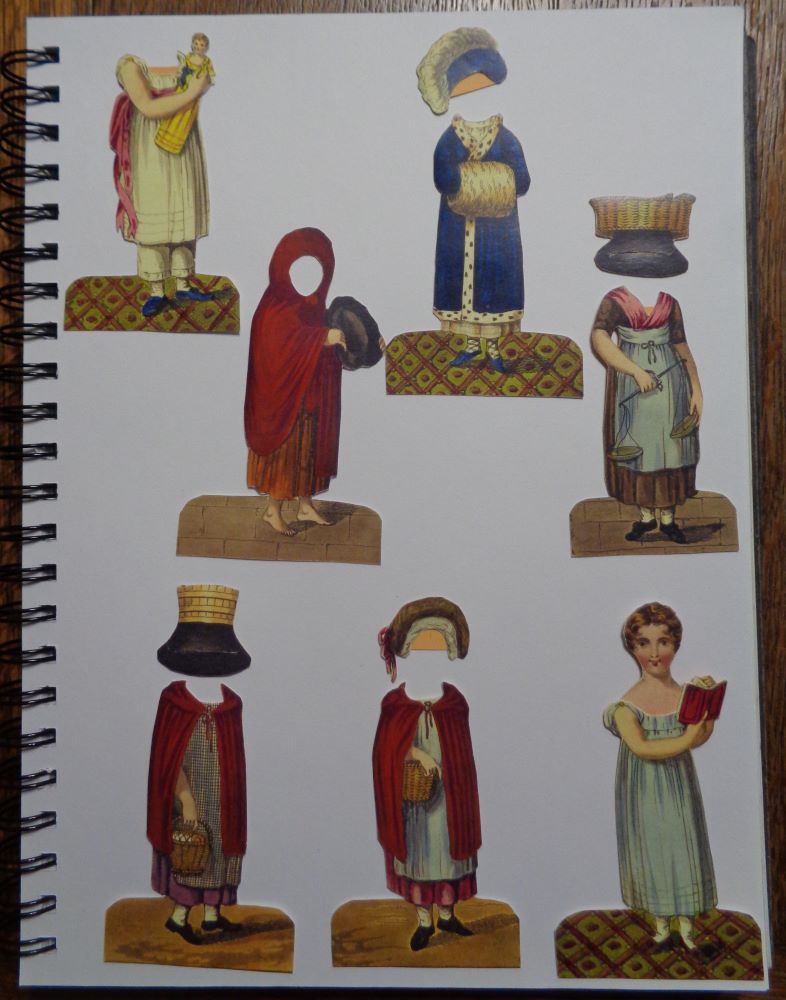
The History of Little Fanny, Exemplified in a Series of Figures was offered in 1810 by the publisher S. and J. Fuller at their magnificent Temple of Fancy, a London emporium of artists’ supplies, instruction books on drawing and painting, and printed toys. It was an expensive plaything, selling for 6 shillings, sixpence – roughly equivalent to $30 today. The set included a small storybook and paper dolls to illustrate each short chapter.
 The copy of Little Fanny that came to the Library as part of the Ellery Yale Wood Collection of Books for Young Readers has been digitized and is available for your perusal on the Internet Archive. We have also put up a pdf that you can download to print out the dolls and make your own set to re-enact the events of the story.
There are brief instructions as part of the document, but we thought you might enjoy seeing the dolls being made.
How to Make Your Own Paper Dolls to Accompany The History of Little Fanny
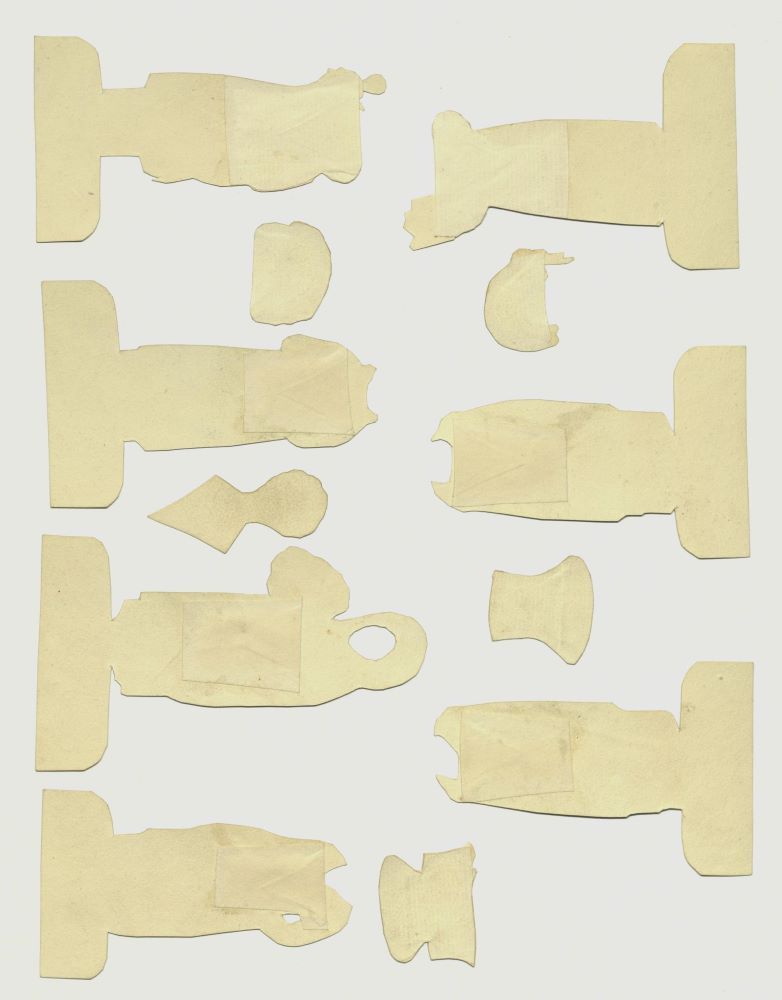
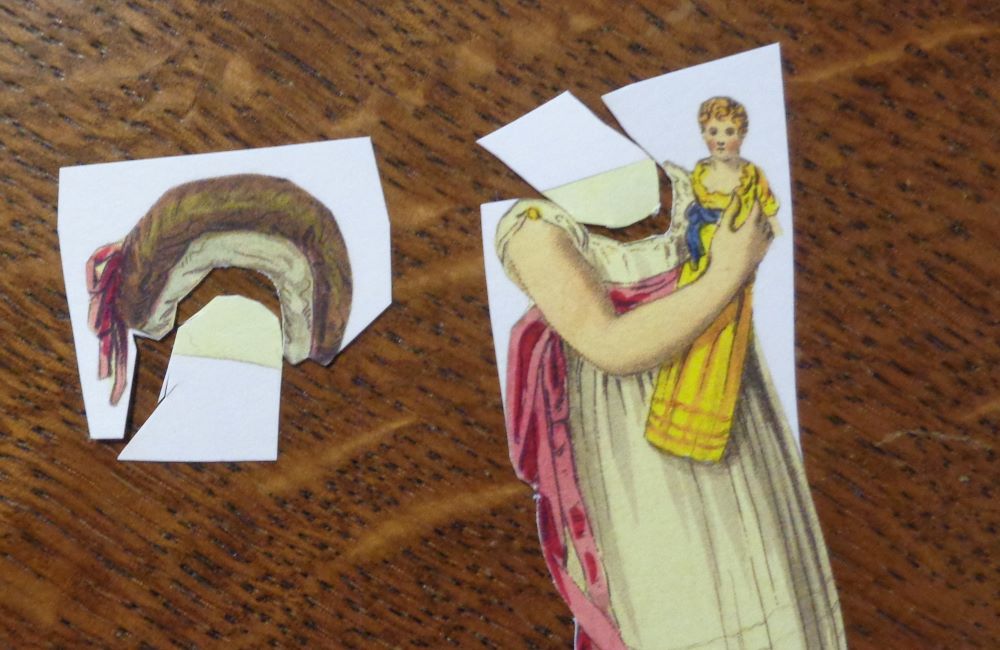
Although the paper dolls that came with Little Fanny were already finished, you can make a set for yourself. The dolls are printed on heavy, stiff paper. A second layer of paper is glued to the back of the clothing to create pockets into which the head fits snugly. Unlike modern paper dolls, the head is moved from garment to garment. Fanny has one head, seven costumes, and four hats.
You will need: card stock to print the figures on; stiff paper to make the pockets for the head; scissors and/or a craft knife; and glue. 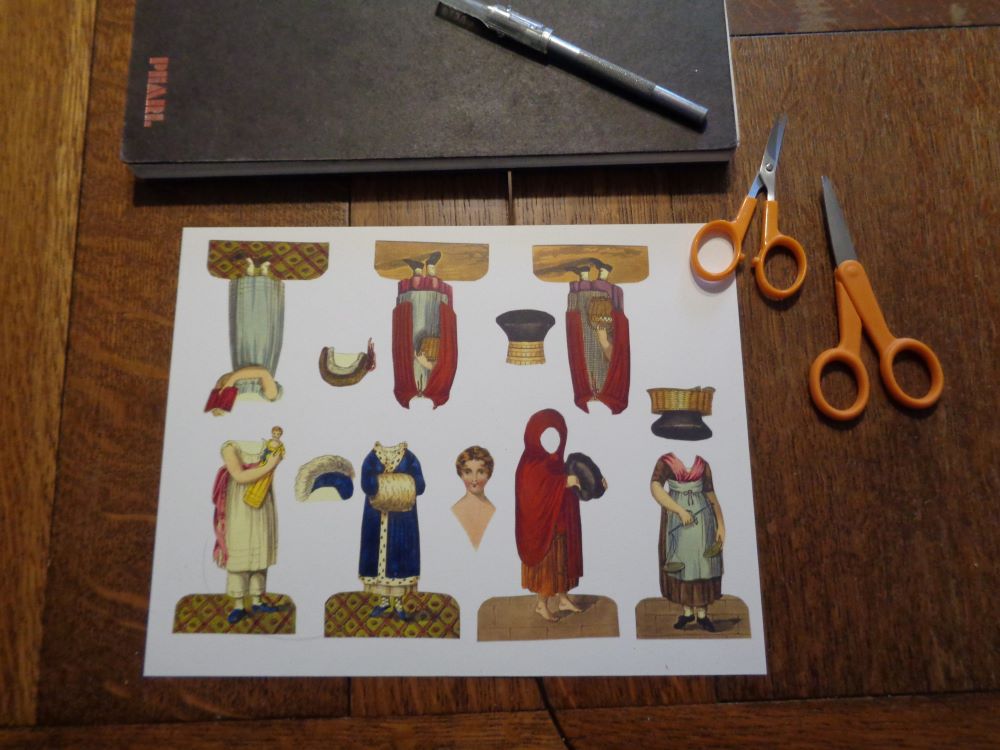 Print the paper dolls onto card stock or another heavy, stiff paper. [Alternative: Print onto office or stationery paper and paste heavier stock onto the back before cutting out the figures.]
Cut out the head and the costumes. Some figures are only partly cut out before attaching the backing paper, which will be pasted all the way past the edge, and cut away at the same time as the printed costume.
 Check the backs of the original figures (Page 2 of the pdf), for guidance. If the backing paper stretches to the edge, it was cut off after gluing.
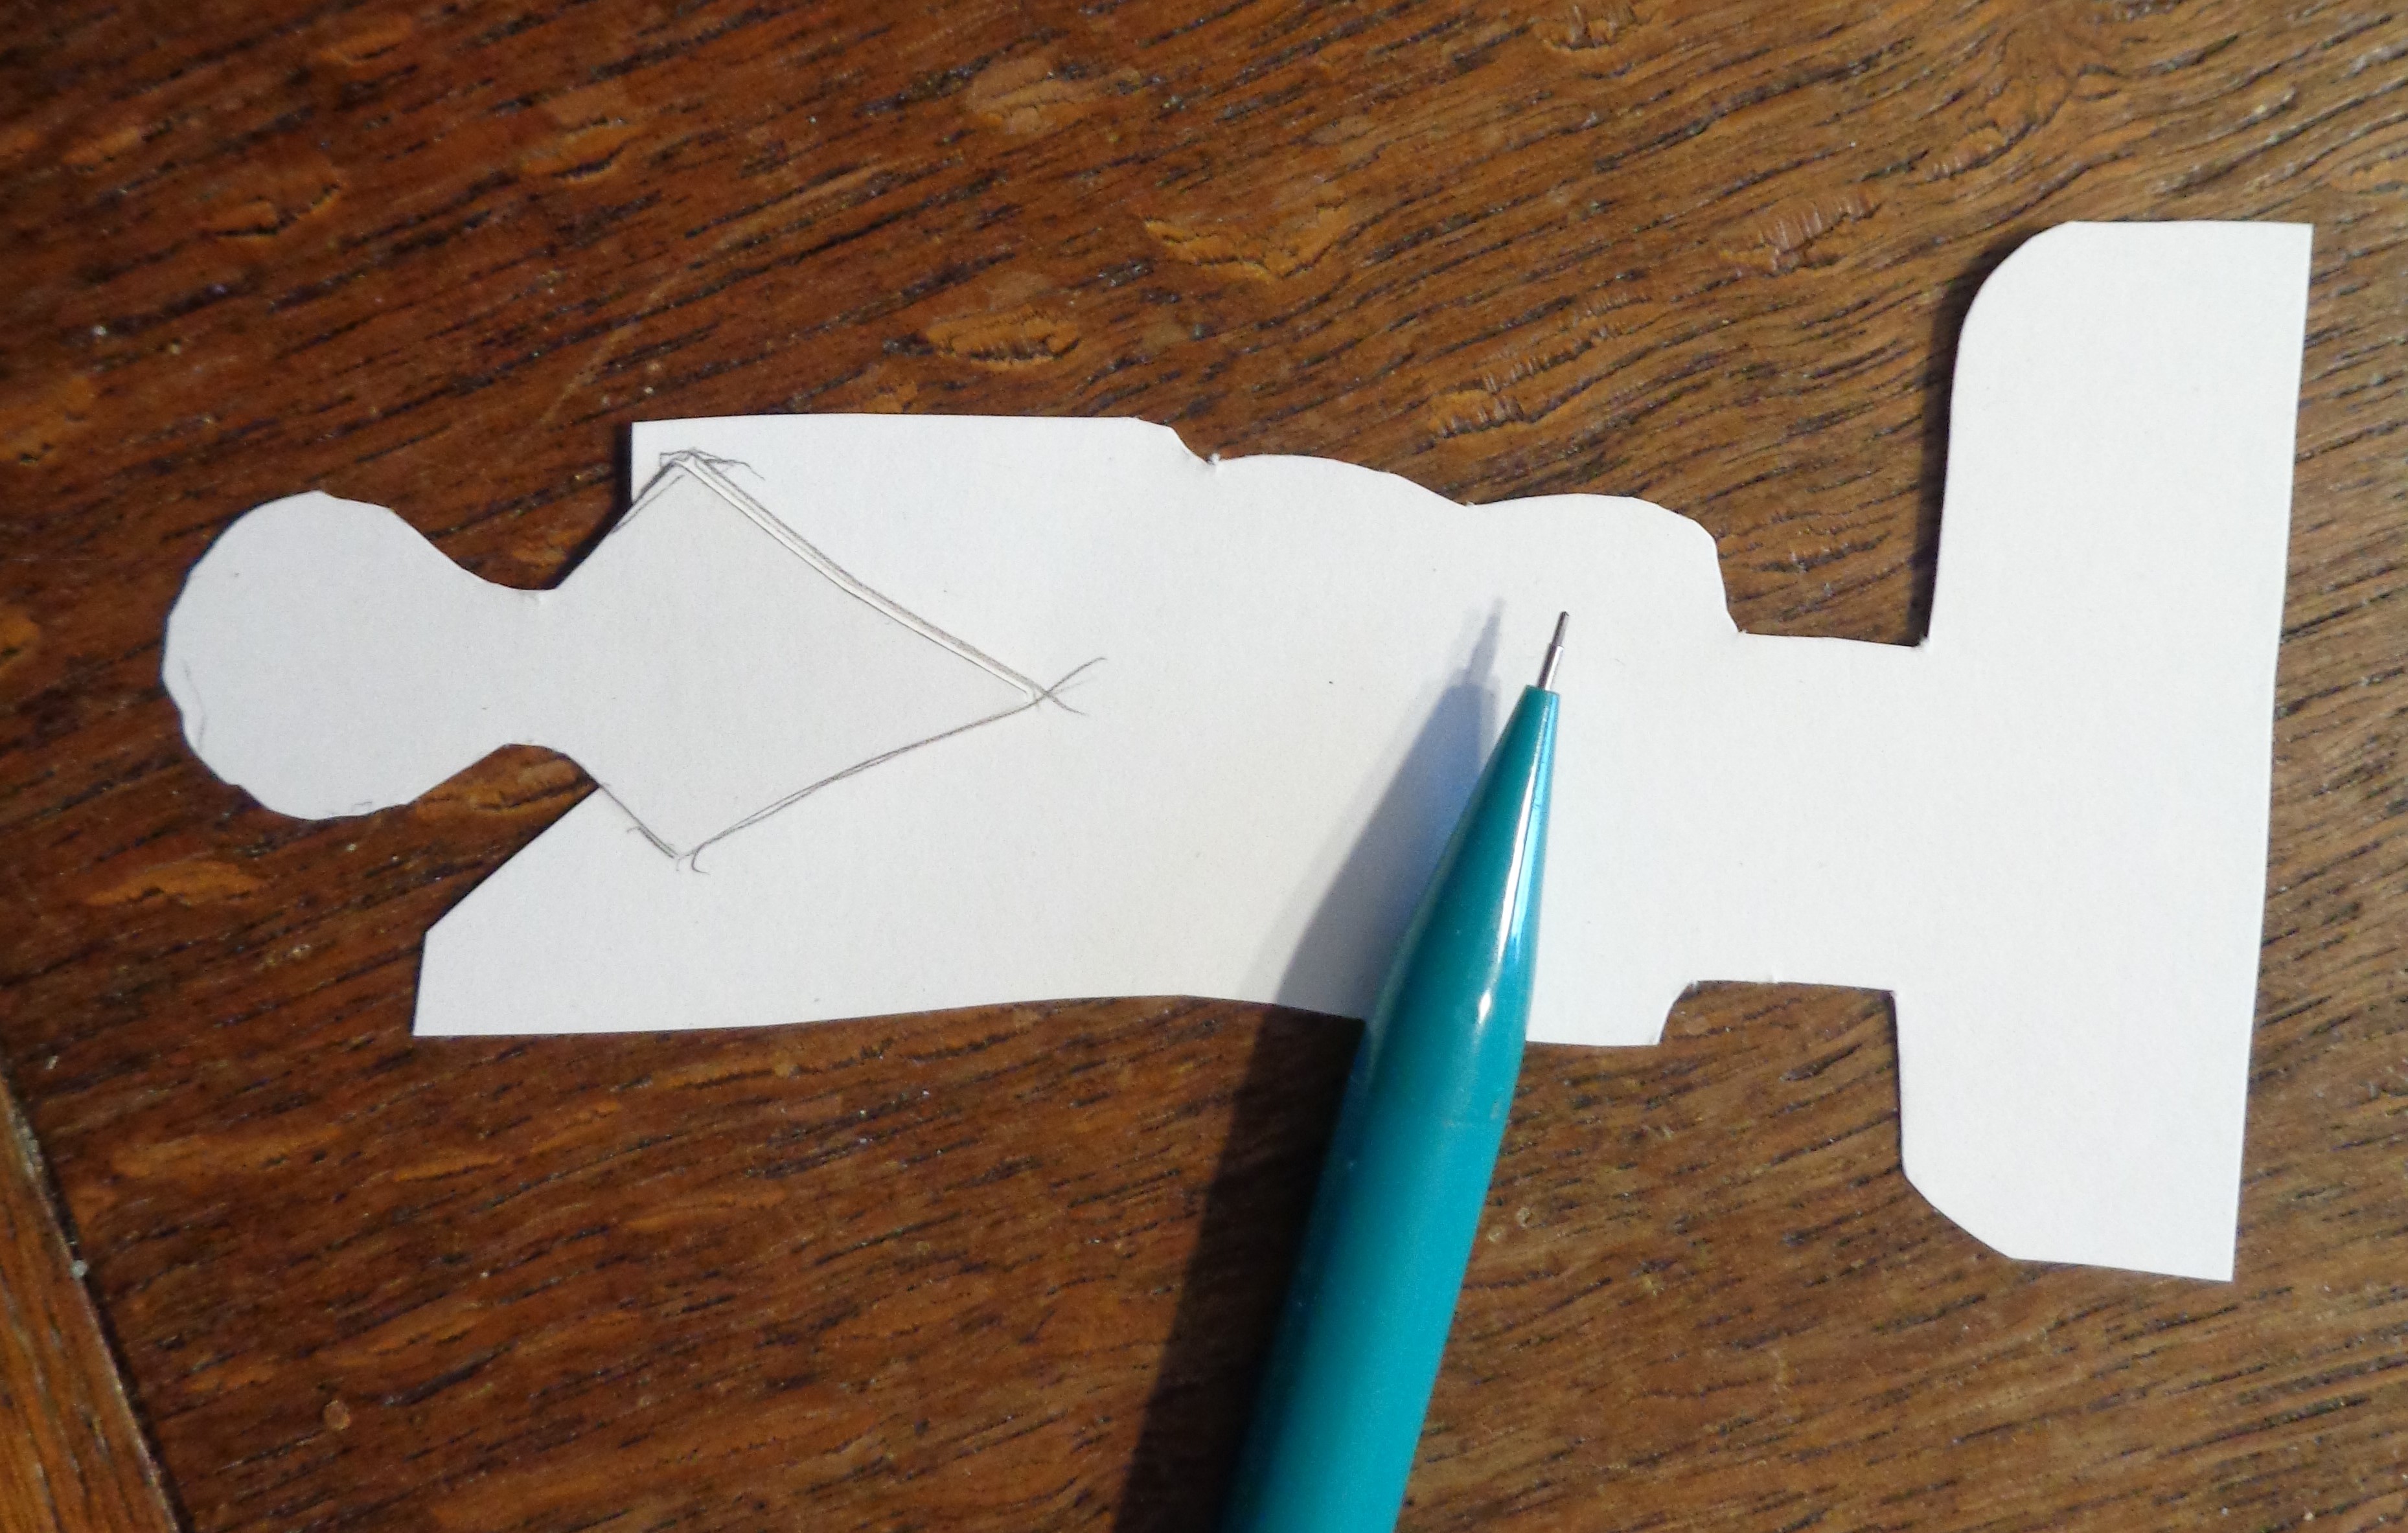
 Line up the head behind each costume. On the back, trace the edges of the neck wedge.
 For the large hats (Figs. #4 and #5), cut a slit with a craft knife along the curved line for the head to fit through.
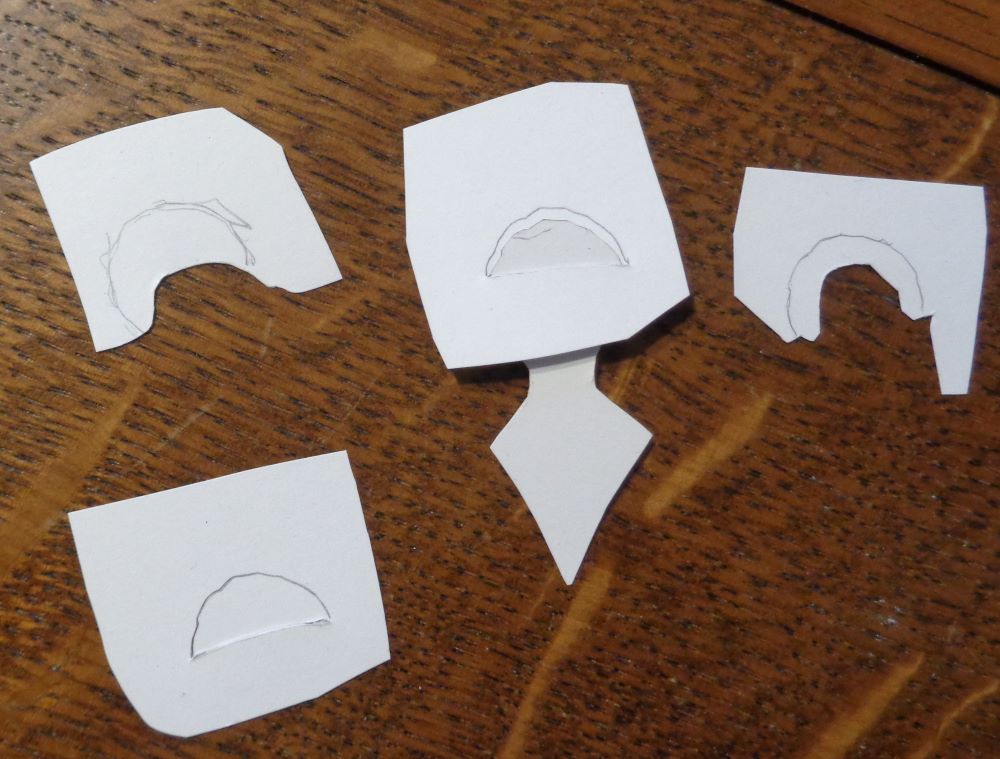
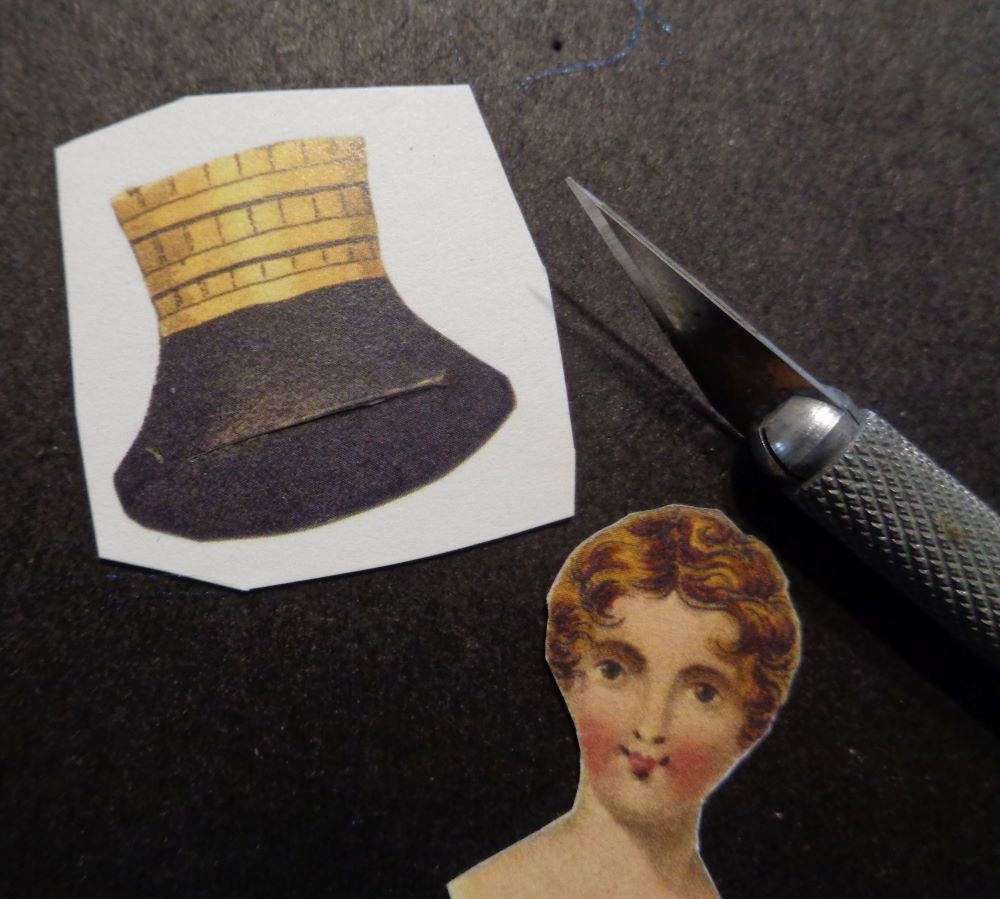 For all hats, on the back, trace the top of the head.
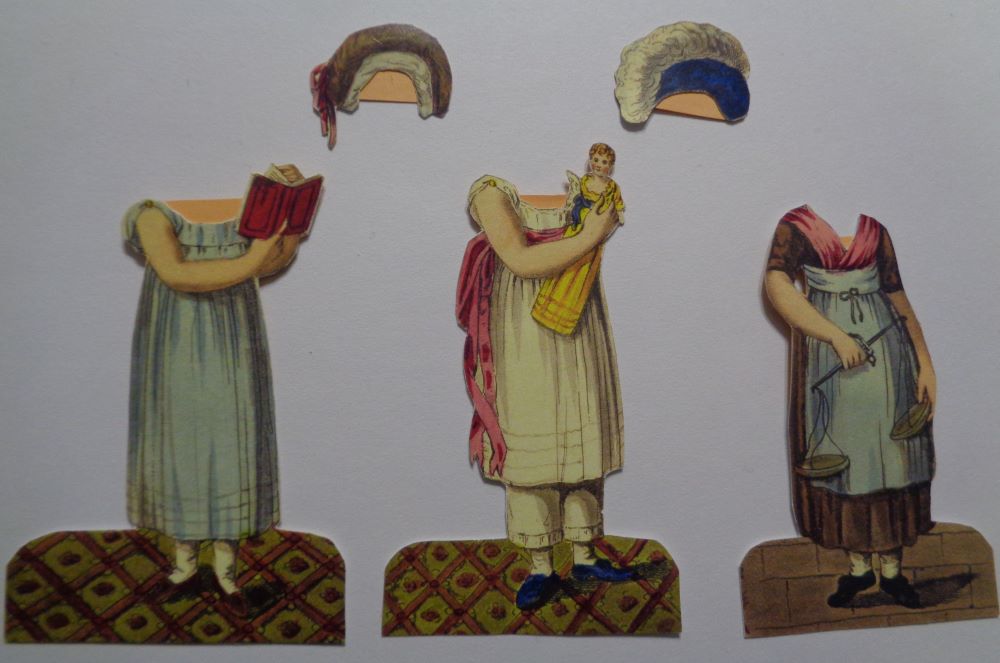
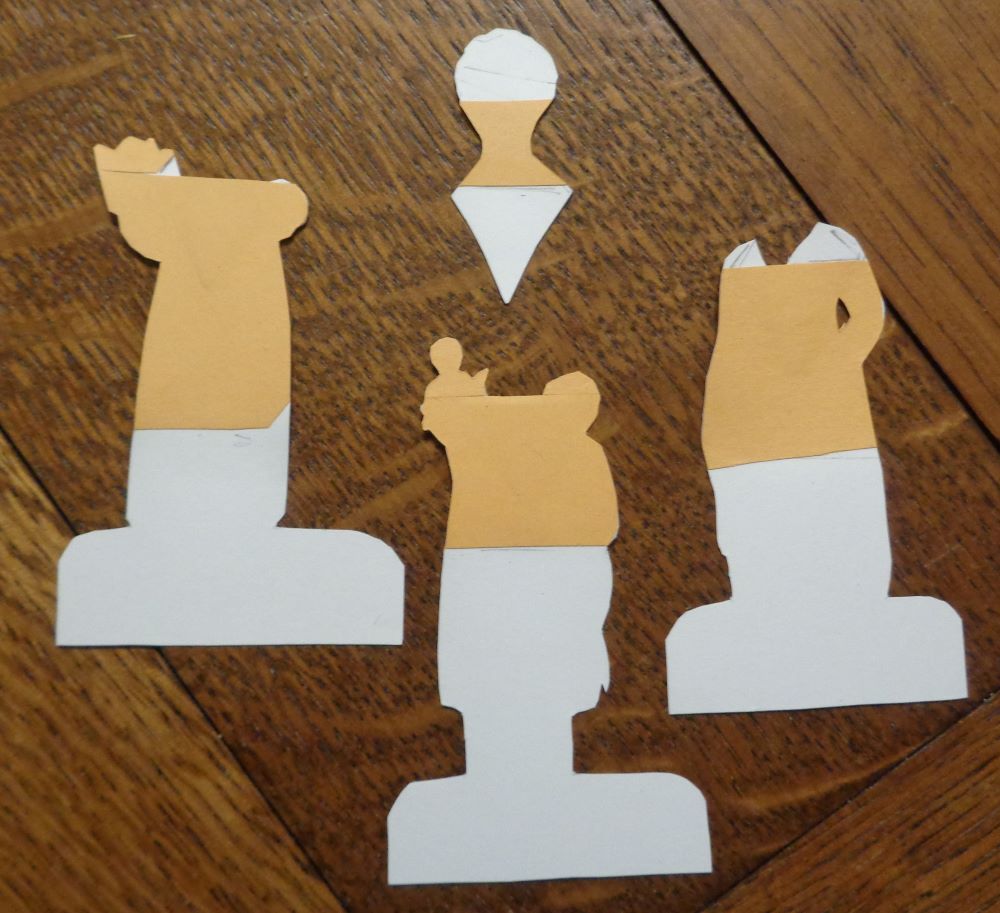
All the pieces cut out and ready for the backings to be applied.
Make the pockets for the head and neck on the back of each costume or hat. Use stiff backing paper (try a manila / kraft paper envelope). This paper will be glued to the back of the costume, with an unglued wedge left open for the neck to fit into.
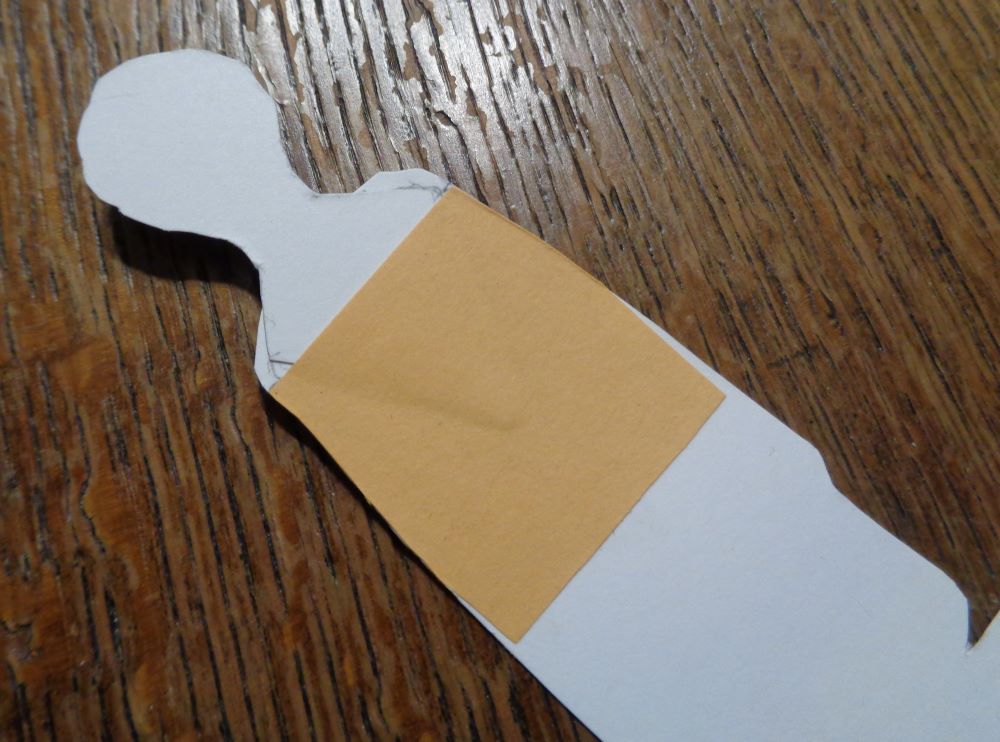 Look at the backs of the originals for shape and coverage. Apply glue to the backs of the costumes. (White glue applied with a paintbrush works well.) Do not put glue inside your traced neck lines and leave a narrow border (1/16” or 1.5mm) around the area free of glue also. [Optional: sketch your border and the edges of the backing paper on the costume before applying glue.]
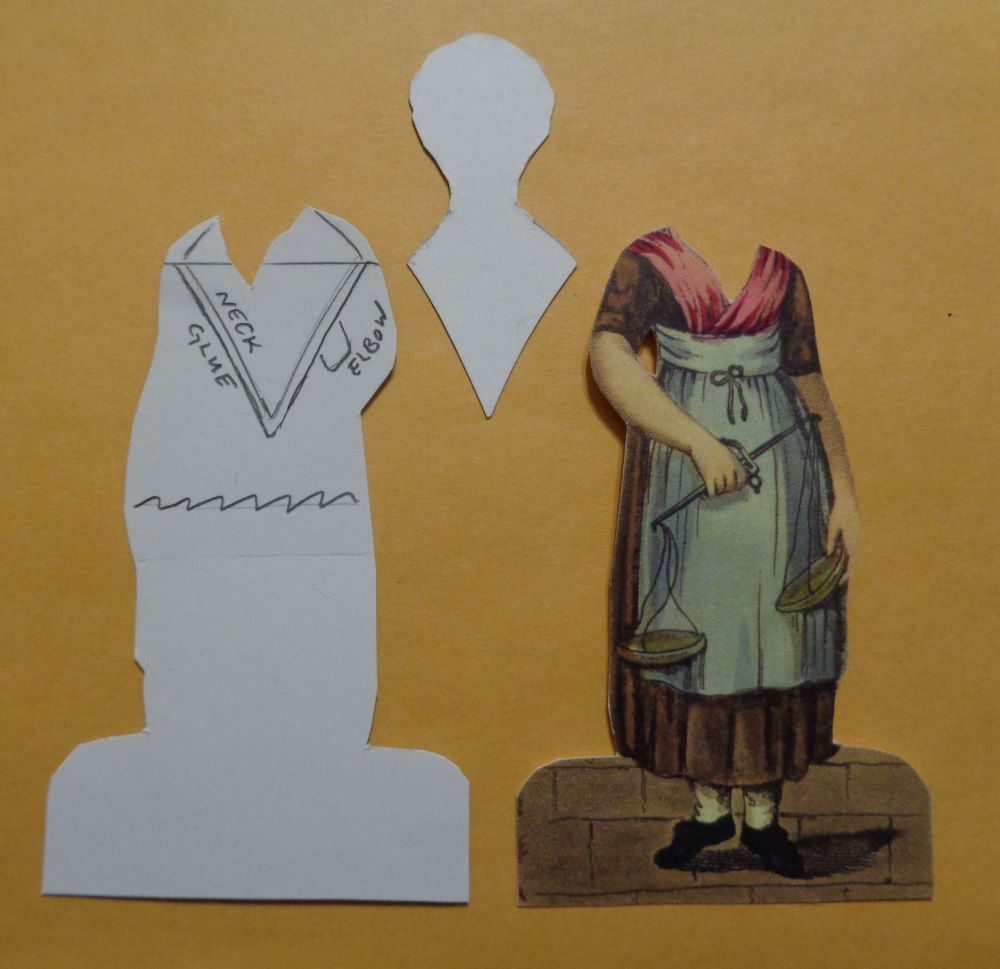
The outline of the neck and the glue line are shown. The horizontal line across the shoulders shows the top of the backing piece; the wavy line at the hips shows the approximate bottom of the backing piece. The diamond shape marked “elbow” will be cut out after the backing is glued on.
Press the assembled costumes flat until they are dry.
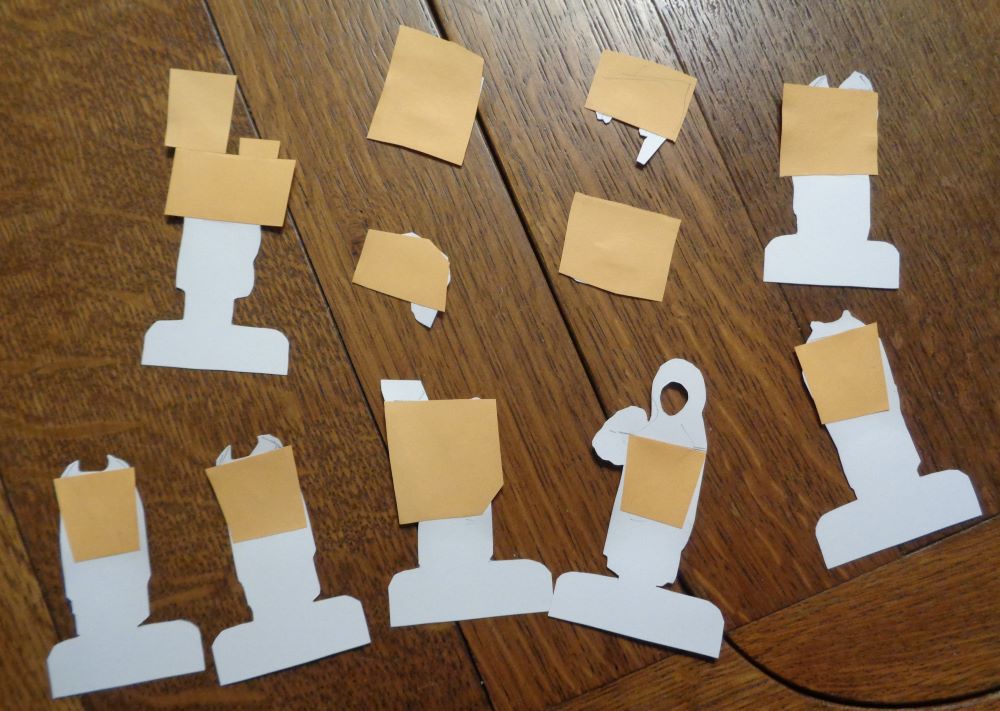
All the pieces with the backings attached and pockets created.
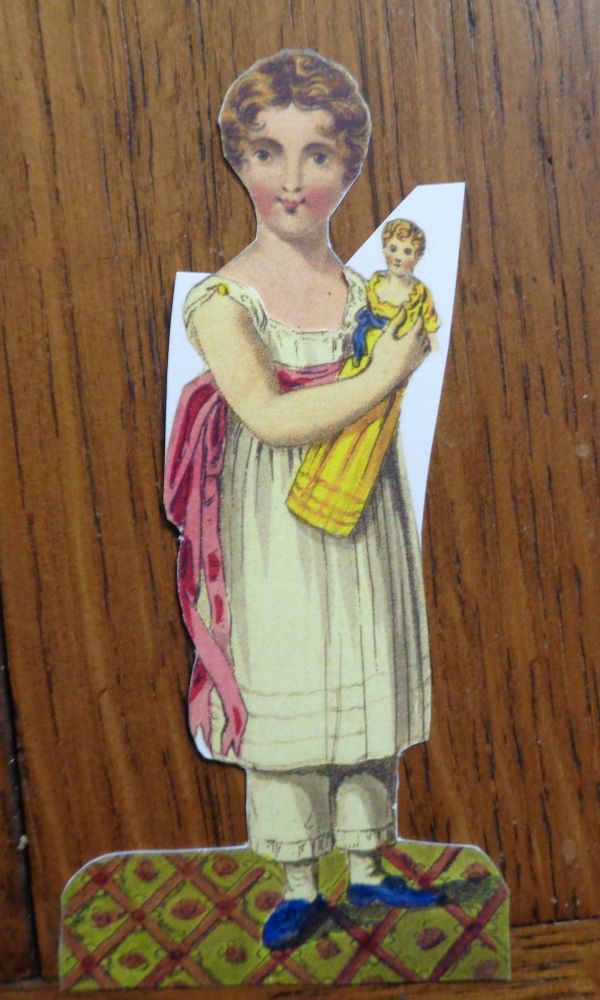
Finish cutting out the figures. Your doll is ready for you to play!
 Additional Hints:
Hint 1 – In some costumes (Figs. 1, 4, and 7) and in the two hats that frame the face, the backing paper is visible as unpainted beige areas in the scanned image. Cut these areas away when you cut out the figures.
 The backing paper will span these areas and will also show there in your dolls.
 Hint 2 – In Fig.3, the beggar costume, the opening in the original is smaller than Fanny’s face. Cut the hole larger if you prefer.
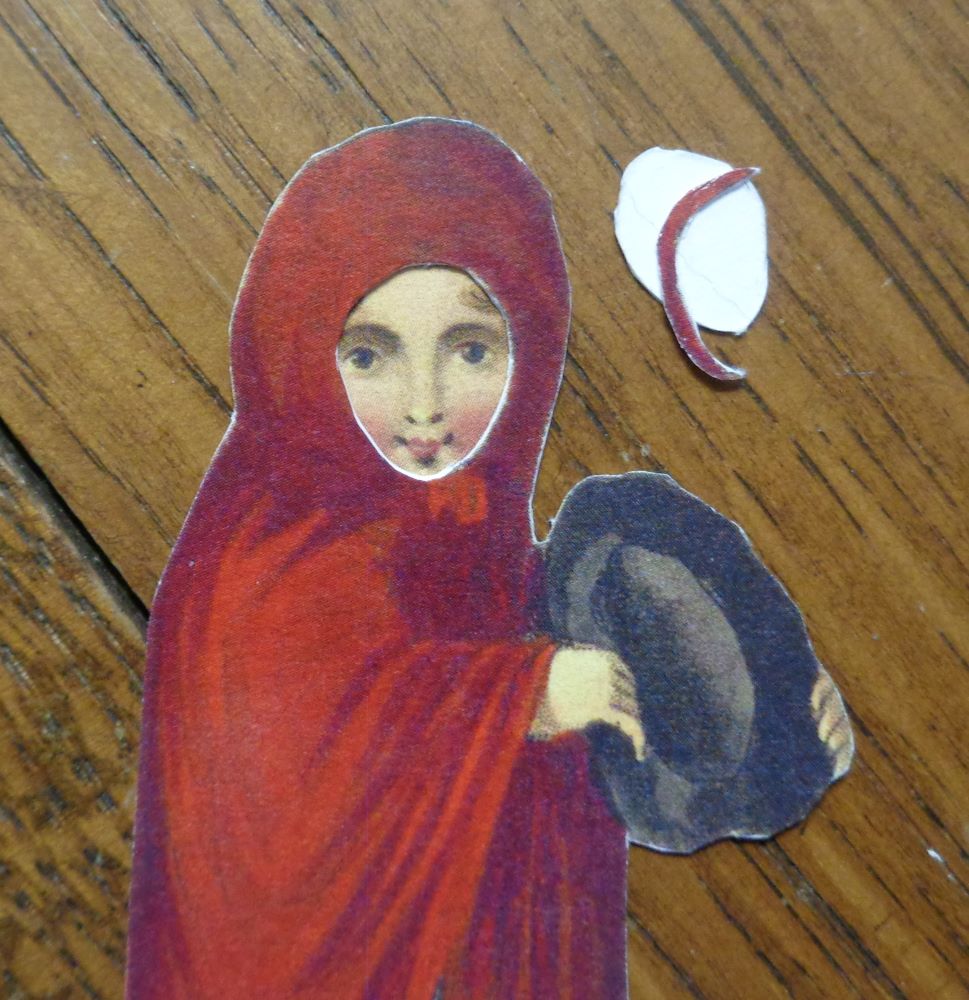
Fanny just peeking out. The white paper oval is the original hole. The red crescent is the additional amount removed to fully expose her face.
Hint 3 – If you want to, reinforce places that might get bent easily, like the neck or the doll in Fig. 1, with extra paper on the back of the figure.
 Enjoy!